Give your water-cooling system a spring clean. Antony leather shows you
how to use mayhems new blitz system cleaners
water-cooling loops might generally be maintenance-free
but, after a year or so, deposits and oxidation eventually
build lp inside you waterblocks and radiators. This can
affect their performance. and even the best Coolants won't eliminate
the issue. Plasticisers used ‘in the tubing. and materials from other
components In the loop. come tree over time and leak into the coolant
Thankfully, Mayhems has sent us an exclusive early sample of its
new Blitz two-pat cleaning system. which promises to clean the
hard-to-reach areas of your loop. You can clean individual radiators
and even add it to a working loop to clean all the parts in one go. You'll
need to set aside a day for this job. and adhere to the instructions. as
some of the chemicals can be dangerous if not handled properly
Tools you'll need
 |  |
| Mayhems’ Blitz Pro Cleaning System | Measuring jug |
 |  |
| ATX jumper/ bridglng plug | Deionised water G1/4in caps |
 |  |
1 / USE GLOVES Some of the chemicals used in the cleaners shouldn't come into contact with your skin, so make sure you use the gloves and goggles that are included with the Mayhems kit for protection. Use an old work surface, preferably outside. when you're filling or draining too. | 2 /MIX PART 1 CLEANER WITH DEIONISED WATER Follow the instructions to create the Part 1 cleaner by mixing the concentrate with deionised water. The first part deals with the radiator. so a higher concentration will be used. Be warned that the mixture may mark the jug, so don't use one from your parents’ kitchen. |
 |  |
3 /EMPTY RADIATOR AND FILL WITH MIXTURE Disconnect your radiator from your loop, drain it and fill it with the cleaner to the brim. Fill both ports to make sure the entire radiator is filled with cleaner. The cleaner shouldn't be used with aluminium core radiators though - only brass or copper models. The manufacturer's website detail the materials. | 4 / CAP-OFF AND BLEED RADIATOR Insert G1/4in caps to seal the radiator. If you don't have any, they're available for about 50p. and are definitely a necessity. If your radiator has additional ports, tilt it to one side to see if you can fit my more cleaner inside. |
 |  |
5 / SHAKE RADIATOR You need the cleaner to make contact with the entire inside of the radiator, so shake it thoroughly and tilt it the other way several times during a two- hour period. making sure there are no leaks. | 6 /EMPTY WASTE MIXTURE Leave the cleaner in the radiator for no longer than two hours. You can then empty the radiator from one port at a time to limit spills. Yod'll likely see the cleaner has turned a dull grey colour, especially with old radiators. which means it‘ s worked. |
 |  |
7 / FLUSH WITH DEIONISED WATER Thoroughly flush out the cleaner using plenty of deionised water, fill the radiator several times and drain it. Normal coolant has a pH of between 6.7 and 7.4, so use the included pH meter to check the drainage -you’ll be fine as long as you're not more than a point or two outside this range. | 8 / REINSERT RADIATOR IN COOLING LOOP Once you've flushed the radiator, connect it back up into your water-cooling system again and disconnect all the power connectors from your hardware. This enables you to only power on the pump for the cleaning stage. |
 |  |
9 /DRAIN OTHER COMPONENTS Drain the other components in the loop, such as reservoirs and waterblocks. either by disconnecting them and draining them separately. or by tilting the system to drain out the old coolant. The Part 2 cleaner needs to comes into contact with all areas, so it can't be hampered by old coolant in the loop. | 10/ MIX PART 2 CLEANER WITH DEIONISED WATER Mix the Part 2 cleaner as per the instructions. This is a pH-neutral solution that can stay in the system for a 24-hour period, cleaning your entire loop. |
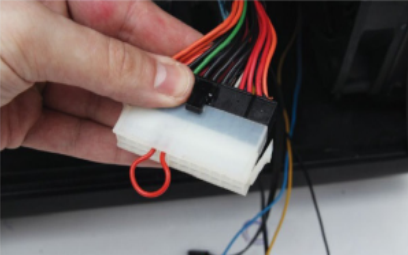 |  |
11 / USE ATX JUMPER TO POWER PSU AND PUMP An ATX jumper can be used to power on the PSU without connecting any power cables to your motherboard. if anything leaks, it will just be a case of drying it out. Use the jumper when cleaning the system, using the PSU’s power switch or the mains wall switch to turn the PSU and pump on and off. | 12 / ADD TO SYSTEM AND BLEED AIR As you can see, the mixture foams quite a bit, so you need to add it slowly and check the reservoir doesn't start to overflow with bubbles. If it overflows. turn off the pump and wait for it to calm down. Eventually you should mainly see liquid going round the loop with a few bubbles in it. |
 |  |
13 / RUN FOR 24 HOURS AND CHECK FILTERS Leave the pump on for 24 hours to allow the cleaner to do its job.if you have any filters, check them periodically in case any debris dislodged in the cleaning has become trapped, meaning the filter needs cleaning. | 14 / FLUSH WITH DEIONISED WATER Once you're done, drain the system as best you can, then begin to flush the entire loop with deionised water. It can help to connect the pump inlet to a supply of clean water and, at the other end of the loop, disconnect a hose joint so you can flush the system in one go. |
 | |
15 /CHECK pH LEVELS The included pH sensor can help to check when your system is back to normal. The pH levels will have been quite low in the Part 1 mix, but you're now looking for a pH level within a point or two of between 6.7-7.4. You can then discard the cleaner down a normal outside draln. |